| Author | Message | ||
Dmitry (Kudryavsky) New member Username: Kudryavsky Post Number: 1 Registered: 12-2008 Rating: N/A |
It is known, that to produce lenticular 3D print of high quality, multi-view series of frames is required. But it is not always possible to take a whole series consisting of 10-18 frames, much easier and faster to take a stereo pair. Therefore, Triaxes company has developed a special algorithm, which can process stereo pairs for further creating realistic 3D lenticular prints. The algorithm was added to the new version 3.5 of Triaxes StereoTracer software. This is allowing lenticular 3D prints to be produced from a stereo pair using the method of depth-map. Let us consider the way of lenticular 3D prints creation by the example of following stereo pair: 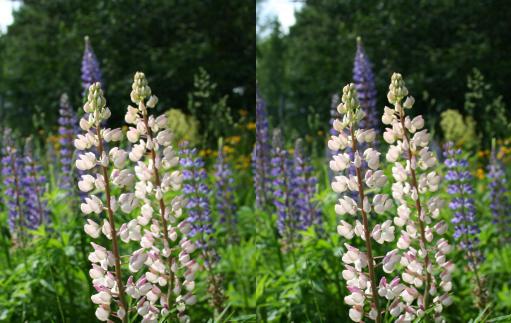 Step 1. Launch Triaxes StereoTracer application and execute Project|New (hot key: Ctrl+N) menu command. Then choose �Stereo pair� project type in the appeared dialog and press �Next�. 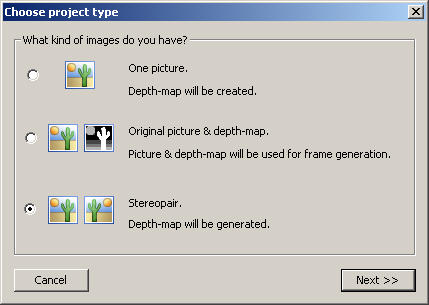 Step 2. Specify the left and right frames of a stereo pair in the �Open source images� dialog and press �Open�. 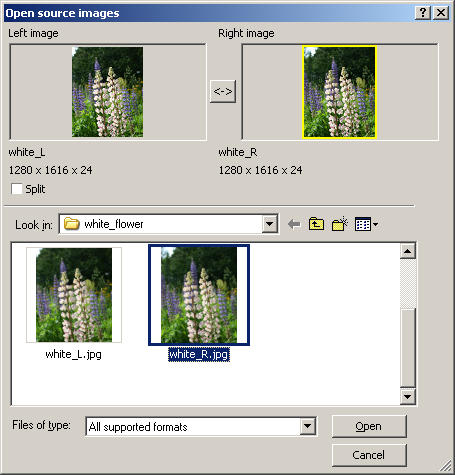 Step 3. Match frames smoothly moving sliders below images � left one by the most distant object and the right one � opposite � by the closest object, thus, to obtain the maximal sharpness of the object, by which matching is being done. 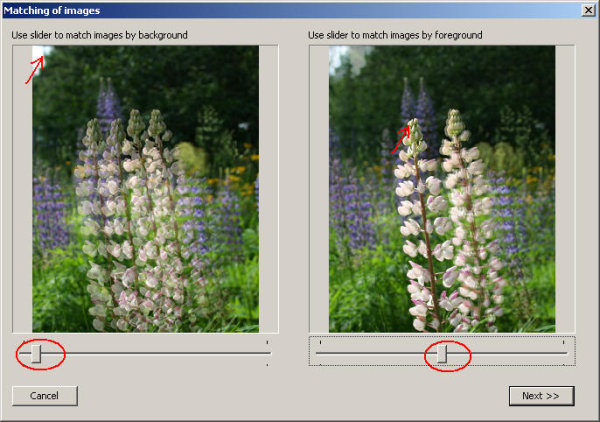 Press �Next�>> The program will create 9 variants of the depth-map. Step 4. Choose the best variant of the depth-map  The program suggests the central variant by default, but for some scenes another choice can be the better one. Criterion for selection is the balance between detailing and smooth gradient filling of the objects. Note: It is also possible to edit selected depth-map manually in the �Depth-map generation parameters� dialog, which opens by pressing the �Tune� button in the �Select depth-map� dialog. Press �Next�. Step 5. The program creates full-sized depth-map. 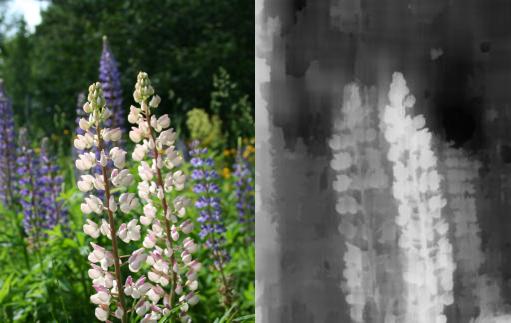 After a depth-map is generated, it is possible to edit it. Edition is not always necessary, but sometimes allows better result to be gotten. 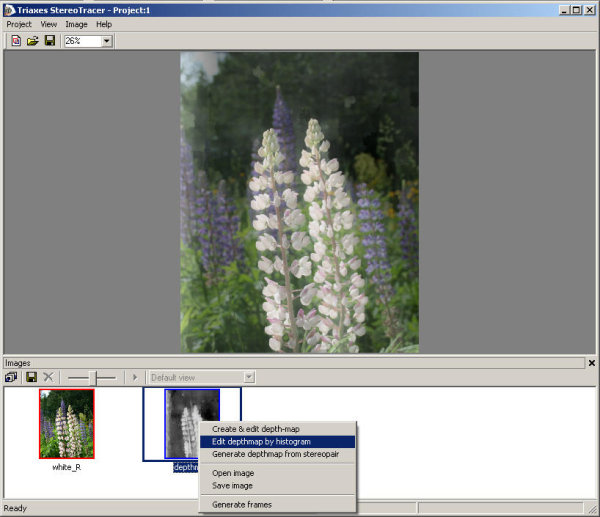 Open context menu by the left mouse button click on the thumbnail of the depth-map in the images list. Select �Edit depth-map� from the list of menu. The �Histogram� dialog will appear. Here we can increase contrast of depth-map and specify blur radius. For the most of pictures, blur of depth-map with the radius of 5-9 pixels, gives a good effect, making generated series of frames more realistic. 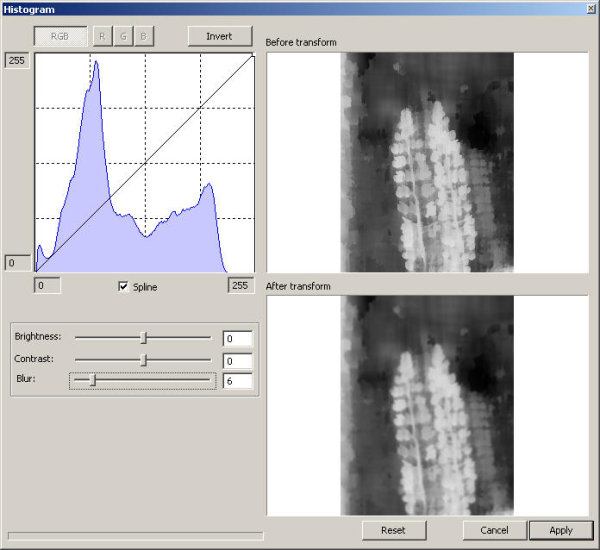 Step 6. Generate series of frames (menu command: Frames|Generate frames; hot key Alt+G) 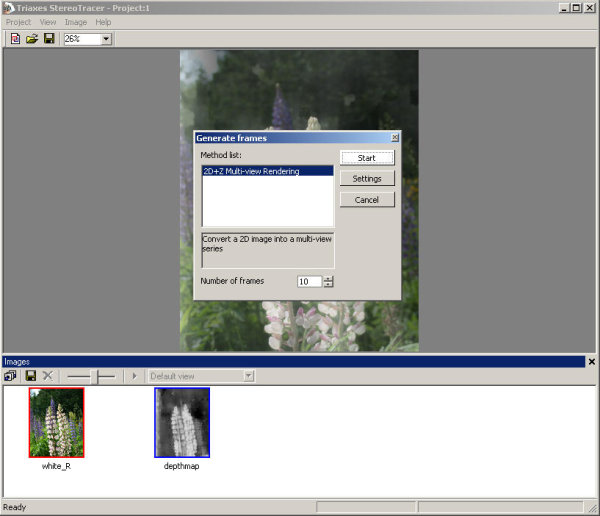 Step 7. The result. You can see the result of the generation in the anaglyph or animation mode. 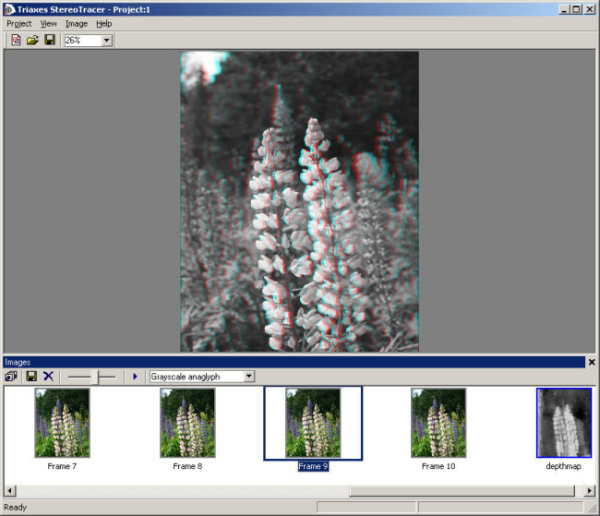 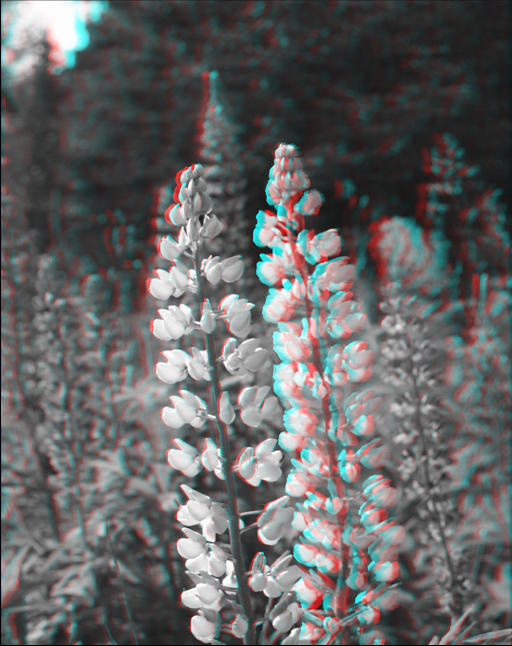 Generated frames can be saved in separated files of BMP and TIFF formats. 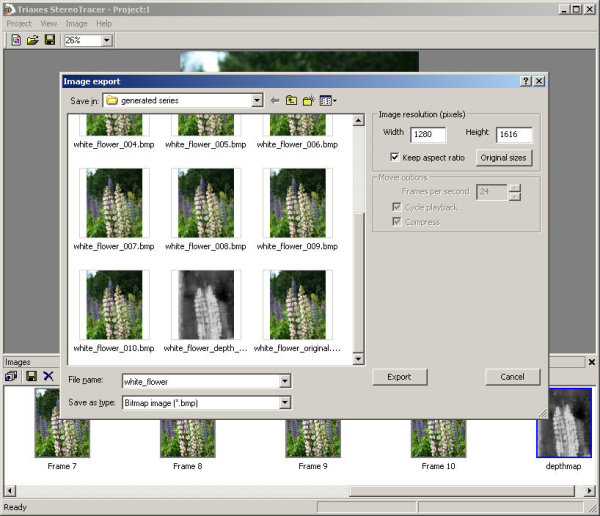 Then, open resultant series of frames in any lenticular image generation software (Triaxes 3DMasterKit is recommended :-) and create 3D lenticular picture. Besides, the program allows series of frames to be exported into animated files �avi� and �gif� with specified resolution and frame rate. This feature is useful for making preview images. Such previews are convenient to be posted on websites and used in demonstrating purposes. 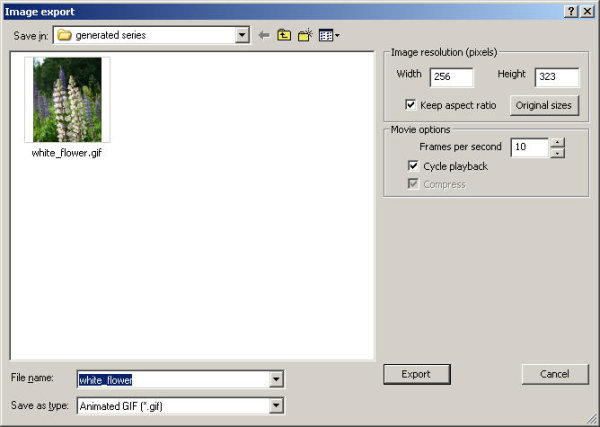 Step 8. Improve the result. There are some cases, when manual editing of depth-map is desired. For this purpose you can use any universal graphical editor. Open context menu by the right mouse button click on the depth-map thumbnail in the frames list. Depth-map will be saved into a file on disk. It may be opened in any graphic editor and perform manual edition. Then, open again context menu and execute �Open image� menu command. After that generate a multi-view series of frames (step 6). Regads, Dmitry Kudryavsky www.triaxes.com |